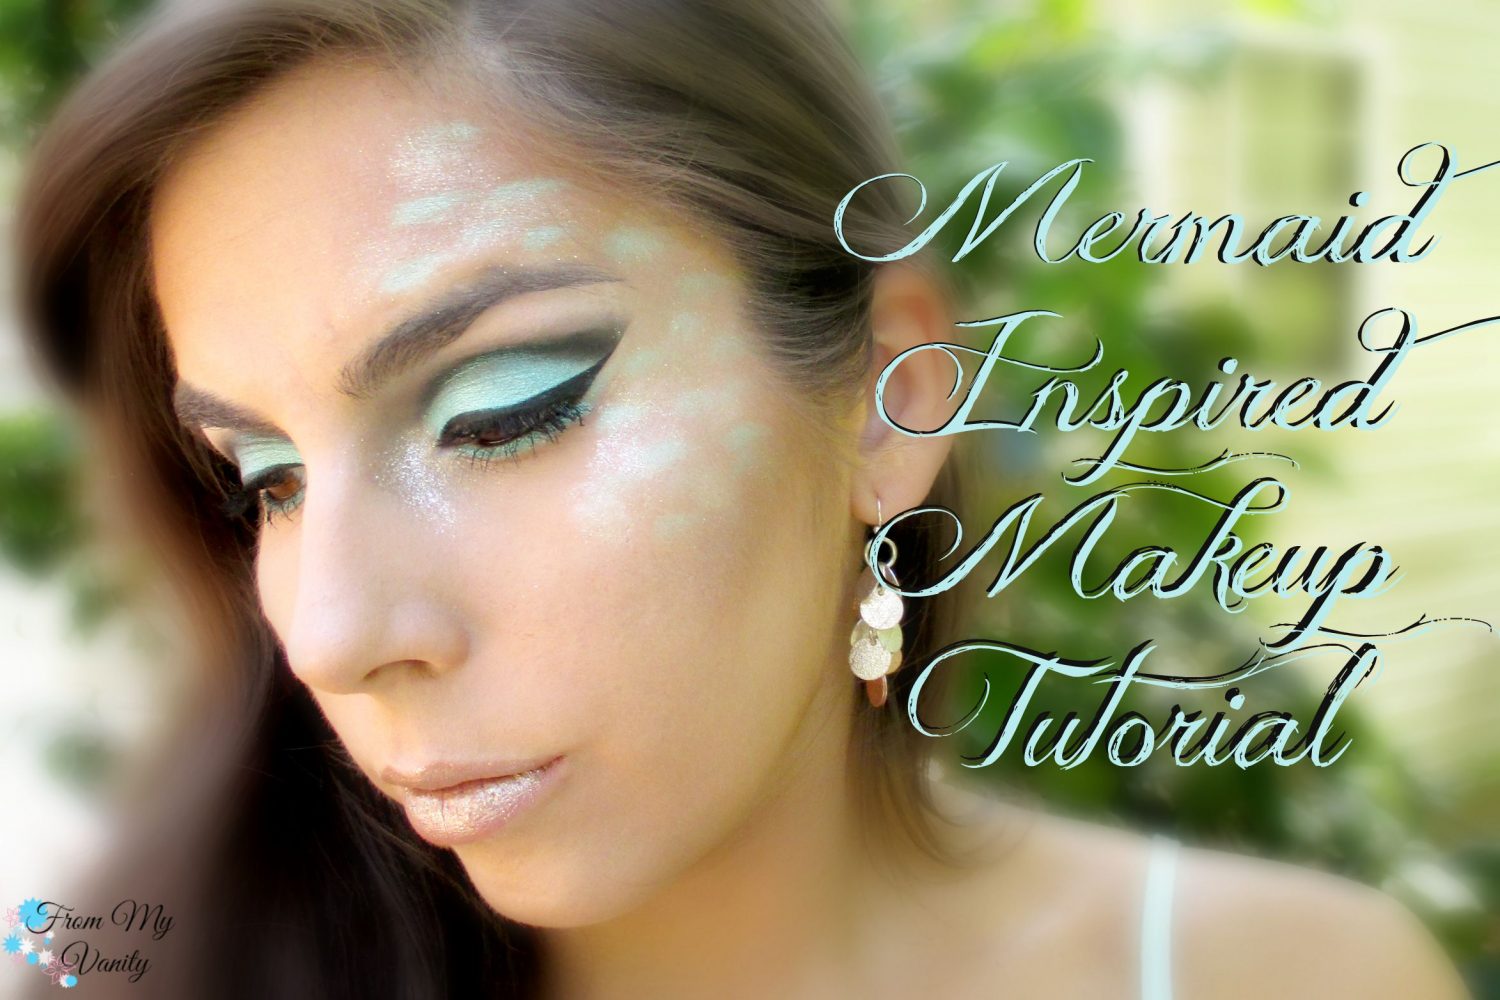
 I know this is way outside the box of what I typically do when I play with makeup, but a bunch of beauty blogger friends had the idea to do a monthly challenge together and I thought it was too fun not to participate. For this month, the challenge was ‘mermaids’ and this is what I came up with….
For me, I went looking through my makeup for something ‘mermaid’y that would inspire me and help me figure out what I would create. And I saw the NYX Prismatic Eyeshadow in the color Mermaid. Well, with a name like that, all the pieces just seemed to fall into place! These shadows are amazingly soft and pigmented, so it wasn’t hard to create this vibrant and sparkly makeup look.
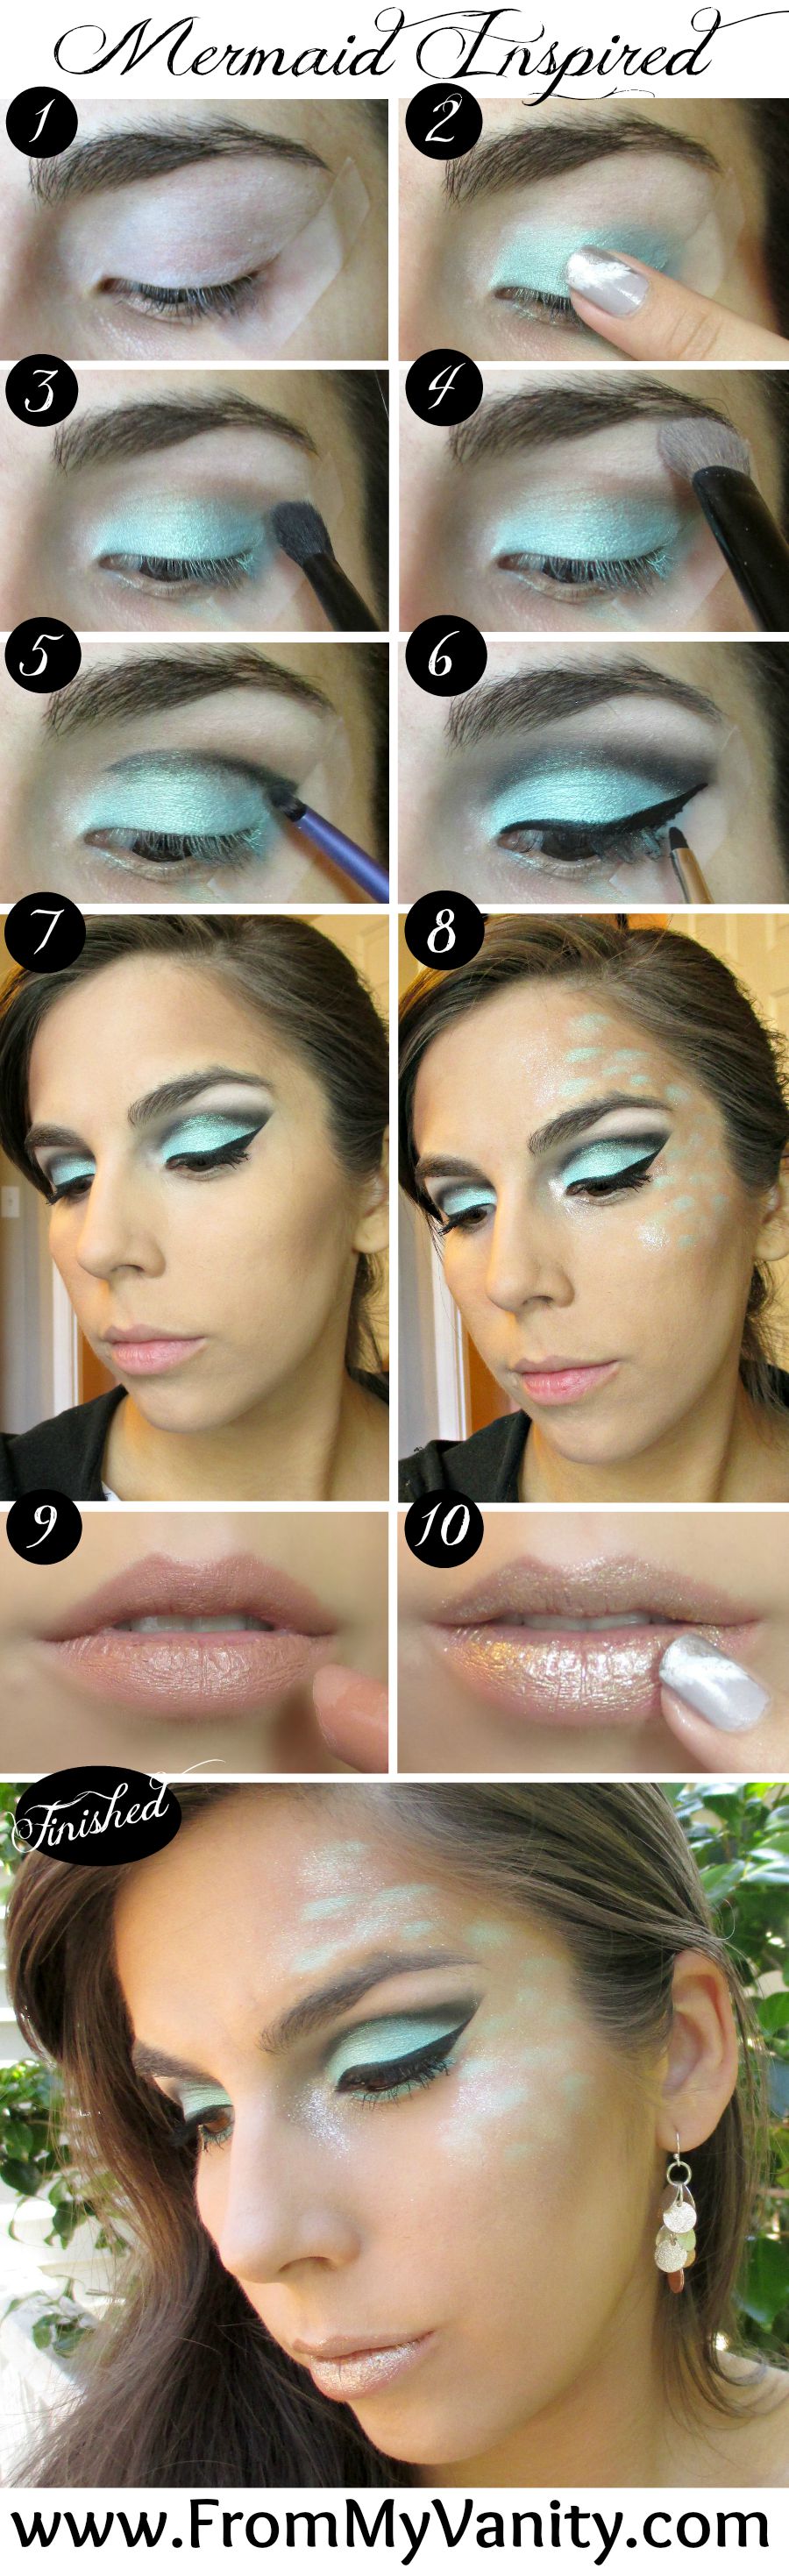 Step 1 // Apply tape to the outer corner of your eyes and apply a white base. I used the NYX Jumbo Eye Pencil in Milk and just blended it out with my finger. This will help your mint green really pop!
Step 2 // Now we pack on that NYX Prismatic Eyeshadow in Mermaid onto the lid. Make sure you keep it well below the crease!
Step 3 // Using a light hand, use a color two or three shades darker than your natural skintone for the transition shade. This will help the crease color blend out. I used the Taupe color from the LORAC Pro Palette.
Step 4 // Don’t forget the browbone highlight! I used the white shade in the Physicians Formula Matte Collection Quad.
Step 5 // Now for the fun part — creating the cut-crease! Make sure you use a very small, precise brush to apply the color. Again, I reached for my LORAC Pro Palette and that awesome, pigmented Black shade. All you’re going to do is draw the color right into your crease. Taking a slightly larger brush (no additional product) blend it upwards into the crease and toward the browbone. Do this in very small strokes! You want to gradually build up the intensity of the black and you don’t want to ruin that sharp ‘cut-crease’ look. Once the crease looks exactly how you want, feel free to go back in with a bit more of the Mermaid shade and make sure it’s super pigmented and that line between the black and mint green is very sharp.
Step 6 // Gotta have a wing with this look! I left the tape on for this part, and it made making the perfect, precise wing so easy and effortless. Once my wing was on point, I just removed the tape and ‘BAM’! No clean-up needed! Oh, and I used my all-time favorite Maybelline Eye Studio Lasting Drama Gel Eyeliner. That stuff is da bomb!
Step 7 // Now just apply your face products. I used Clinique’s Universal Superprimer, Too Faced Born This Way foundation, LORAC POREfection Baked Perfecting Powder to set, and Too Faced Chocolate Soleil Matte Bronzer to give me a sun-kissed glow.
Step 8 // Now to create some scales! I just dabbed my finger into the Mermaid color once again and tried to apply the color randomly along one side of my face. Once that was on, I took the loose glitter pigment from the Too Faced Stardust by Vegas Nay collection and applied that in between the mint green. Really packing it on! I also applied some to the inner corner of my eye.
Step 9 // On to the lips! I wanted it to have a really nude, frosty look, and since I didn’t own any nude frost lipsticks, I just used this lipstick from Maybelline’s ColorSensation Creamy Matte in the color Nude Embrace.
Step 10 // Dipping my finger once again into the loose glitter pigment, I packed this onto my lips. And there you go, your own DIY frosty lipstick (though it’s a lot more glittery in person. So pretty!).
There you go, all done! I’ve never done anything so creative with my makeup and this was the first time I ever tried my hand at a cut-crease. I was really, really happy with the results! And if I ever wanted to dress up this Halloween, I know what I would go as!
 As I mentioned at the beginning, I created this look as part of a monthly challenge. We will be sharing a different makeup challenge on the last day of every month and I plan to participate as often as I can. Now that you’ve seen my creation for this challenge, check out the other gals who also participated this month…
[inlinkz_linkup id=558923 mode=1]
If you want to participate in this challenge and create something “mermaid” inspired — it can be anything: makeup, hair, nails, etc — please do and use the hashtags #onmondayswemermaid and #mermaidmonday so we can see what you came up with!
